Adding a charger to Fuuse is a simple process of "pointing" it towards Fuuse. The following guide details how to setup a single socket charger.
Fuuse treats each socket or connector on a charger as a separate EVSE and so each one must have it's own charger entry.
This guide assumes you are adding your charger to an existing site. For a guide on how to add a site and charger in one go, click the link below:
Creating a New Charging Site
If you want to add a multiple connector charger, you can follow our separate guide here:
Adding a Multiple Connector Charger
Contents:
- Logging In
- Network
- Charging Site
- Hardware ID
- Add EVSE
- Add Connectors
- EVSE Photos
- Location Directions
- Save Changes
- View & Edit Charger
1. Logging In
Log in to the web portal at app.fuuse.io to get started.
Click the arrow besides "Network" in the side menu on the left to drill into that section.
Select "Charging Sites" from the expanded menu.
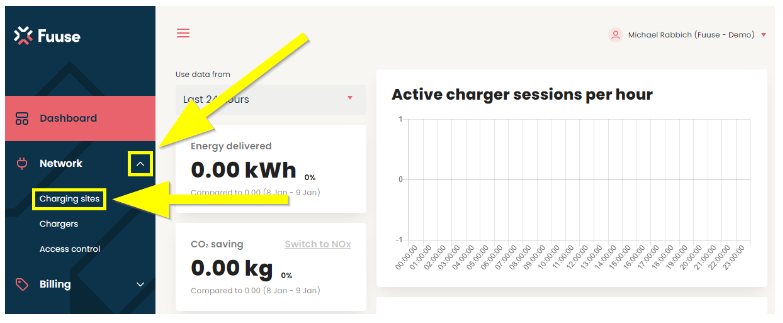
2. Network
Use the search box or browse the list to find the site you want to add a charger to.
Click the "See Details" button beside the relevant site to continue.
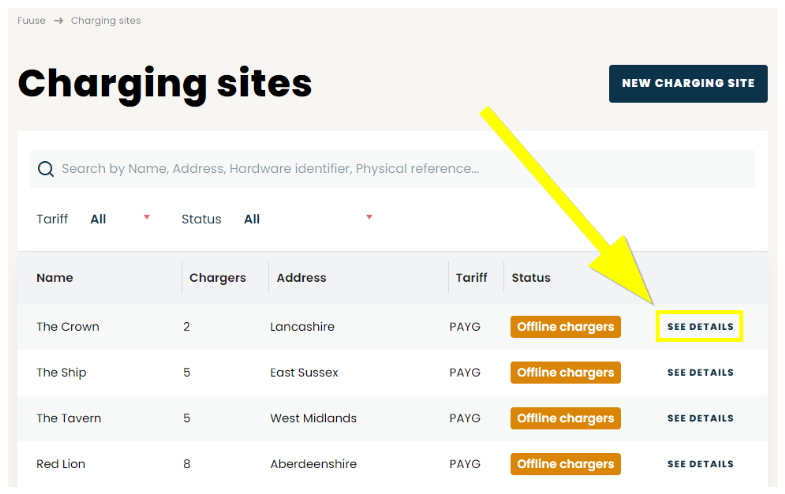
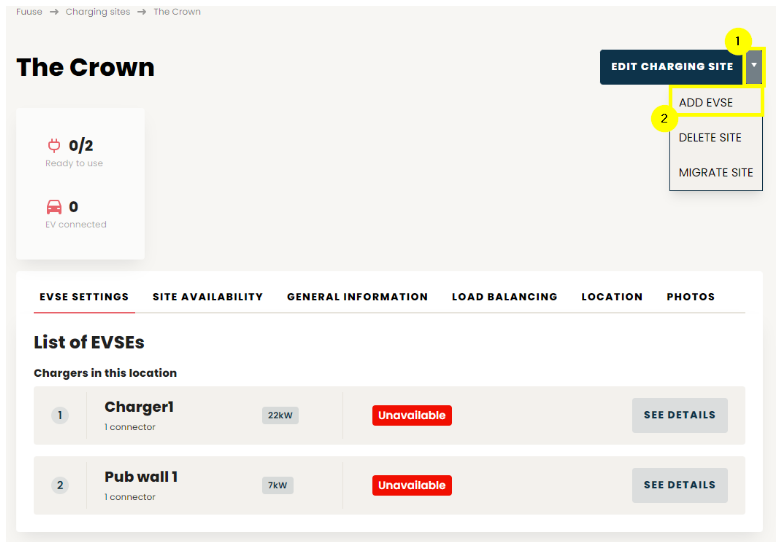
3. Charging Site
Here you can see all chargers currently set up at this site:
1. Click the arrow beside the "Edit Charging Site" button (not the button itself) to open a context menu.
2. From the menu, click the "Add EVSE" button.
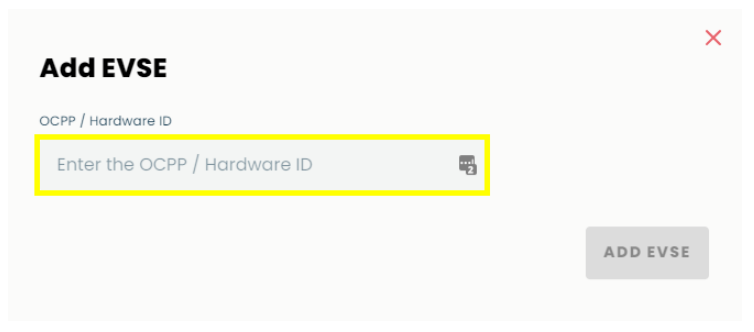
4. Hardware ID
First you will be prompted for the OCPP / Hardware ID of the charger you are trying to add. This is an ID specific to your piece of hardware that allows us to point it to Fuuse.
This can usually be found on the hardware itself, in the supplied documentation or passed on from the manufacturer. If you are unsure what it is or can't find it, it is best to contact the manufacturer for advice.
5. Add EVSE
The details of your charger can be added here:
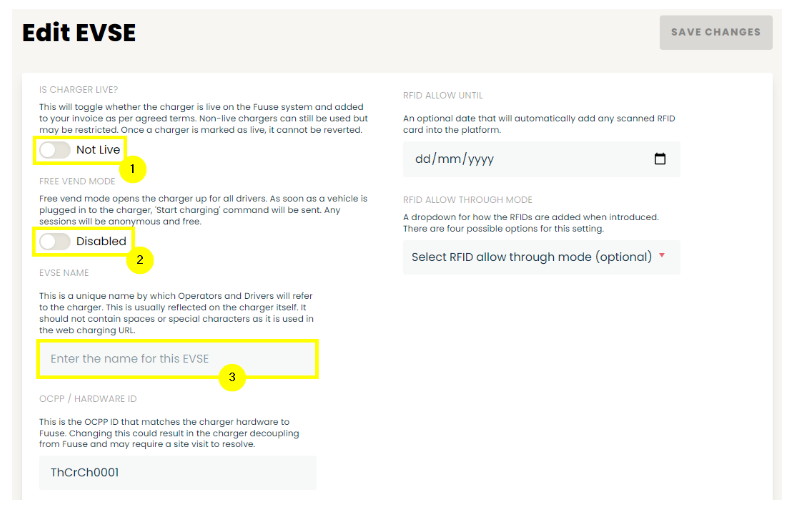
1. Is Charger Live? - As stated in the portal, this will toggle whether the charger is live on the Fuuse system and added to your invoice as per agreed terms. Non-live chargers can still be used, but may be restricted. Once a charger is marked as live, it cannot be reverted.
2. Free Vend Mode - This opens the charger up for all drivers. As soon as a vehicle is plugged in to the charger, a "Start charging" command will be sent. Any sessions will be anonymous and free.
3. EVSE Name - All chargers connected to Fuuse have a unique name, not just amongst the chargers you manage, but out of every single charger on the platform, so bear this in mind when creating them. Using some part of your brand name is the best way to ensure the names are unique.
Charger names must be no more than 16 characters long and contain:
- Alphanumeric characters (ABC123)
- Hyphens ( - )
- Underscores ( _ )
Your charger name must NOT contain any special characters or spaces as it will be used for the web charging URL.
Charger names will also be saved in the case you originally enter them within the Fuuse platform itself, even though they are not functionally case sensitive. For example, the charger name could be entered as:
- fuusecharger01
- FUUSECHARGER01
- FuuseCharger01
Also consider the length of your charger name to ensure it allows room for growth as your operation adds more chargers. If we used the charger name "FUUSECHARGER0000", the four digits at the end allow for a potential 10,000 unique combinations, plenty of room for future growth.
Continue down the page ensuring to fill in as much information as possible:
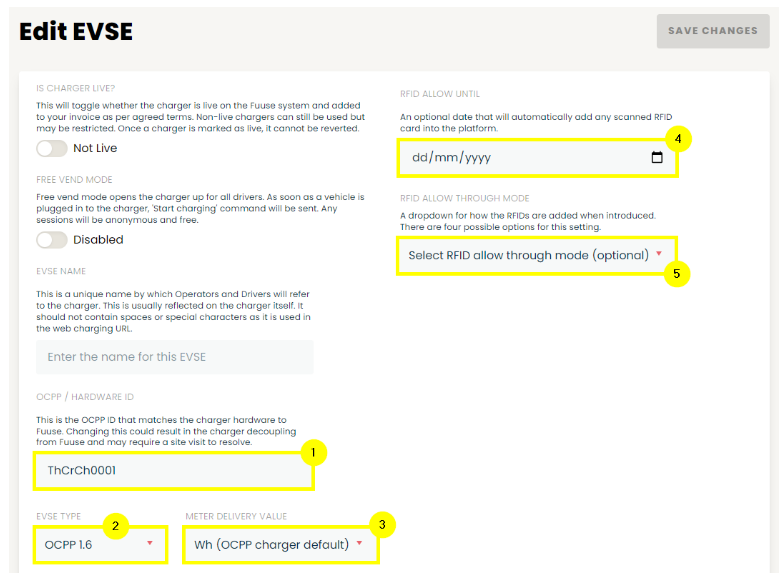
1. OCPP / Hardware ID - This should already be prefilled as you were prompted to add it in step 4.
2. EVSE Type - Select the appropriate EVSE type for the hardware you are adding:
- EO - Select this specifically when installing EO branded charge points.
- OCPP 1.6 - Open charge point protocol 1.6 is largely considered the standard for the majority of commercial EVSE's in operation at this time.
- OCPP 2.0 - While Open charge point protocol 2.0 isn't widely supported right now, it likely will be going forward.
3. Meter Delivery Value - The delivery value will automatically change depending on whether you select EO or OCPP as your EVSE type, as they require a different value. If for some reason you wish to override the default, this can be done using the drop down.
- Joules - This is the default value used for EO chargers
- kWh - Kilowatt hour might be preferential for high capacity rapid chargers
- wH - Watt-hour is the most commonly used value and the default for OCPP EVSE's
4. RFID Allow Until (Optional) - By default, all chargers added will only accept RFID tokens that are already in the system. However, a charger can be re-configured to accept all RFID cards for a period of time and have them added to the RFID card library. This is useful when adding new chargers which may come with as yet unregistered RFID cards.
Click the calendar icon and select the cut off date if required.
5. RFID Allow Through Mode (Optional) - This optional mode setting defines how RFIDs are handled when used:
- Adds the cards as pre-accepted and turns the mode off after the first RFID added - A new token will be created for the first unknown RFID card presented to the charger, after which the mode will be disabled.
- Adds the cards as pre-accepted and turns the mode off when the "Allow Until" is hit - New tokens will be created for every unknown RFID card presented to the charger before the date specified in the "RFID Allow Until" field above.
- Adds the cards as invalid and turns the mode off after the first RFID has been added - A new invalid token will be created for the first unknown RFID cards presented to the charger, after which the mode will be disabled. This new RFID token will not permit use of the charger until it has been reviewed manually in the web portal and activated.
- Adds the cards as invalid and turns the mode off when the "Allow Until" is hit - New invalid tokens will be created for every unknown RFID card presented to the charger before the date specified in the "RFID Allow Until" field. These new RFID tokens will not permit use of the charger until they have been reviewed manually in the web portal and activated.
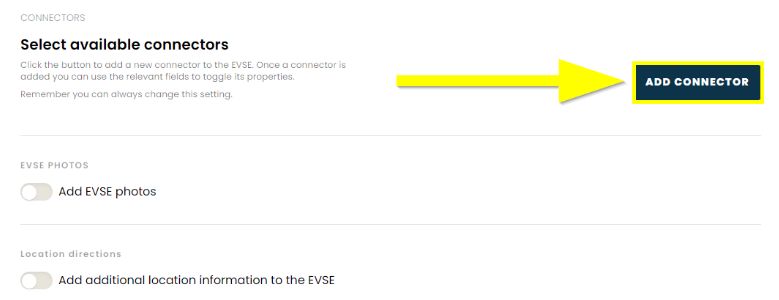
6. Add Connectors
Click the "Add Connector" button to add a single connector to your EVSE.
Please note: EVSE's with multiple connectors that can be used simultaneously must have each connector configured as a separate EVSE within Fuuse. If your EVSE has multiple different connectors, but only one can be used at once, then these can be added to a single EVSE.
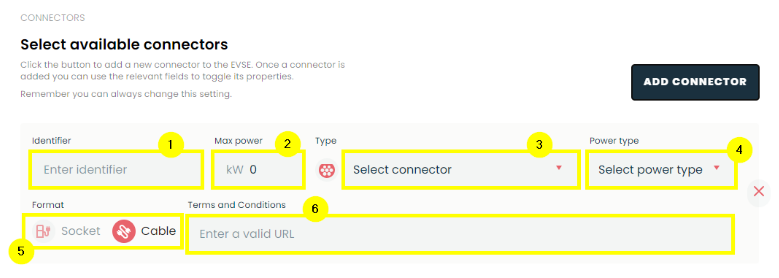
To complete the EVSE configuration, you must provide details of at least one connector present on the EVSE:
1. Identifier - This is the unique ID for the connector within the EVSE. For OCPP chargers this will always just be incremental for each of the connectors on the charger i.e. 1, 2, 3 etc. So for a single connector you can use a simple identifier such as "OCPP1".
2. Max Power - The maximum rated power output of the connector in kW.
3. Type - Select the connector type from the drop down box. The documentation from the manufacturer should inform you which is the correct choice for your EVSE.
4. Power Type - Select the power type from the drop down box. Again, the correct choice should be in the manufacturers documentation.
5. Format - Select whether your connector is in the form of a socket or a cable by clicking the relevant icon.
6. Terms and Conditions - If you have a website with terms and conditions for the use of your hardware, you can enter the URL here.
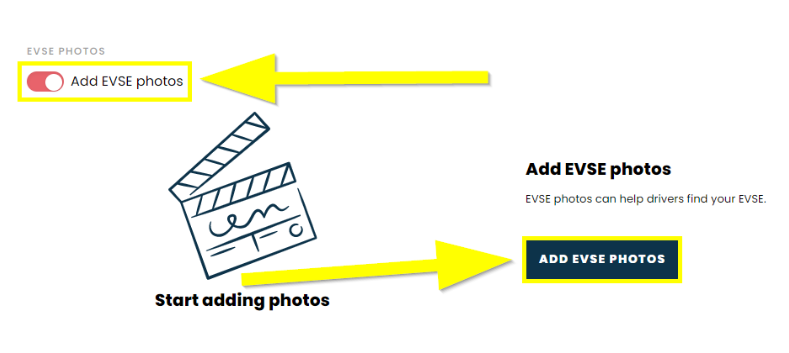
7. EVSE Photos
Photos of the EVSE can be added if desired, although they are entirely optional. This can be useful if you think customers might struggle to identify the location of the EVSE because you have a large site or to distinguish a fast charger from the standard ones.
Click the toggle for "Add EVSE photos" to expand this section.
You can now click the "Add EVSE Photos" button, as shown below.
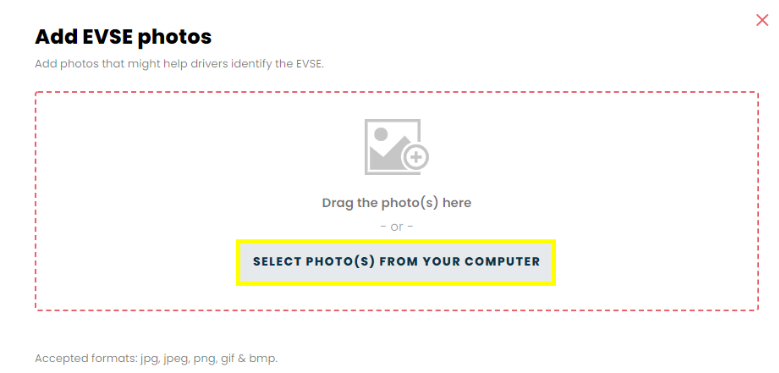
Either drag and drop your images where shown or click the "Select Photo(s) From Your Computer" button to find them on your device.
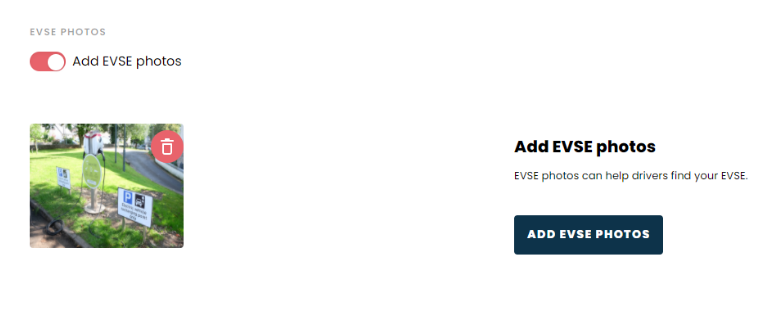
Your images will now appear as shown below.
Click the trash can icon in the corner of an image to remove it.
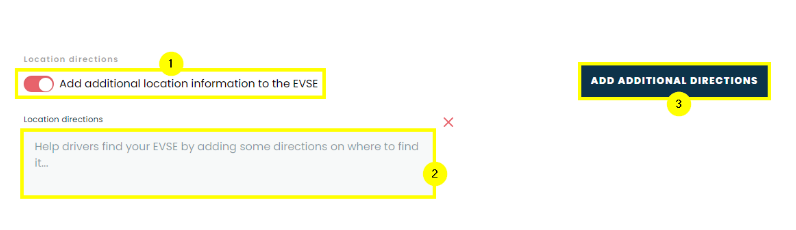
8. Location Directions
Further optional information can be added about your charger in the form of location directions. If the EVSE is hard to find or distinguish within your site, adding a few lines here will help your customers overcome this:
1. Location Directions - Click the toggle for "Add additional location information to the EVSE" to expand this section.
2. Text Box - Space for you to enter your location directions will be provided. These can be removed by clicking the X in the top right hand corner of the text box.
3. Add Additional Directions - Click here to add one or more text boxes to enter further information.
9. Save Changes
When you are happy with all the information you have entered, and as long as all required information has been provided, click the "Save Changes" button at the top or bottom of the screen.