This guide will walk you through the process of adding new drivers and how to view their individual activity.
Contents:
- Drivers Screen
- All Drivers & Vehicles
- Add Driver
- Add Vehicle
- Driver List
- Driver Details
1. Drivers Screen
From the side menu of the Fuuse web portal, click "Drivers" to open that section.

2. Drivers & Vehicles
On the drivers / vehicles screen, click the "Add Driver / Vehicle" button.

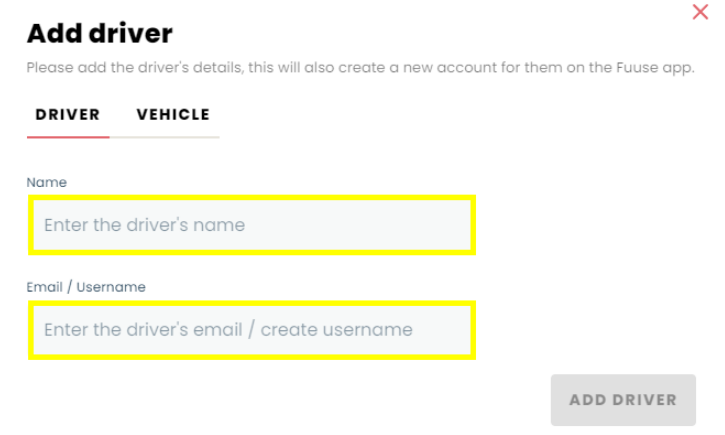
3. Add Driver
A small modal will open with two fields that allow you to enter your driver or vehicle information.
On the "Driver" tab (open by default), you can enter the full name of your new driver in the box provided under "Name".
Enter the drivers email address under "Email / Username". This will also serve as the drivers username when logging in to the account.
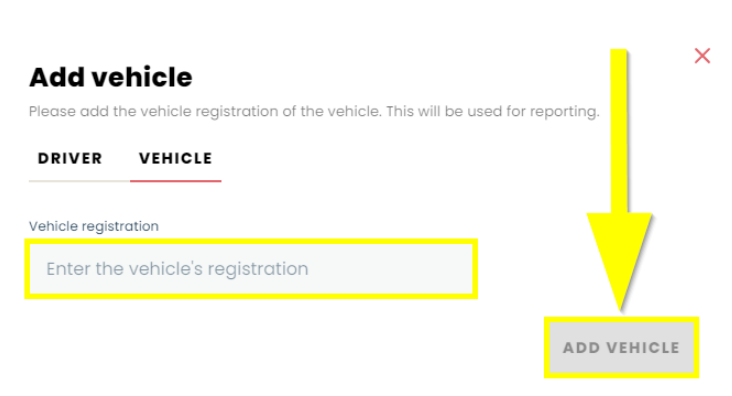
4. Add Vehicle
Switching to the vehicle tab allows you to add a vehicle by inputting it's registration number in the box provided. This step is optional and is only used for reporting purposes.
Once you have finished adding the details of your driver / vehicle, click the "Add Vehicle" button to save your choices.
5. Driver List
After saving your new driver, you will be returned to the driver / vehicle list. All drivers previously created will be displayed here in a paginated view along with your new addition.
If you have a large amount of drivers and wish to find a specific one, use the search bar at the top of the list. Part or all of a drivers name or email address can be searched for.
To see more details about a specific driver, click the "See Details" button next to the driver in question.

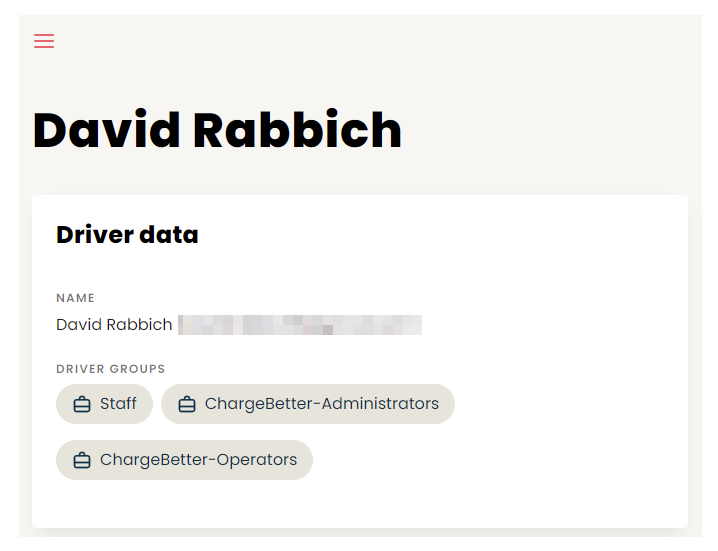
6. Driver Details
The driver details screen is split into two sections. The first part displays the drivers name, their email address (pixelated in the example below) and any driver groups they have been assigned to.
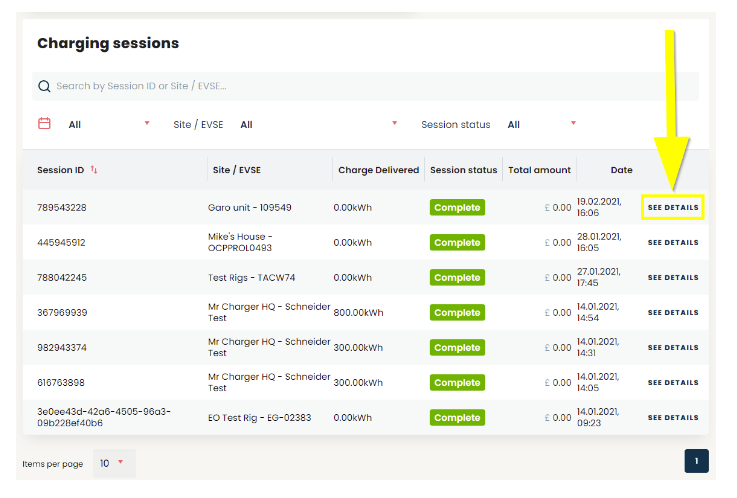
The second section gives a breakdown of the drivers past charging sessions. This is exactly like the charging log section, but the information is specific to this one driver.
The search bar at the top allows you to find specific sessions if needed by searching information such as the session ID, the site or EVSE name etc.
Click the "See Details" button to drill into more specific data and functionality about that particular charging session.
7. Block/Remove Drivers
To remove a driver from your organisation, once in the driver details screen you can click 'Remove Driver'. This will remove the link to your organisation.


By clicking Block Driver, this will block the driver from your Network. The driver will not be able to access your chargers until you remove the block via the driver details.

Please note, that block driver feature is not auto added to your organisation, please contact your account manager or support at Fuuse to enable.