To ensure your chargers are visible on popular EV charger navigation maps like Zapmap, this comprehensive guide outlines the step-by-step process to configure the necessary settings.
Please note:
- If you wish to apply paid tariffs to your charge points, you will need to contact the Fuuse Customer Success team to enrol your account with FuuseBilling
- The ability to display your chargers on external EV Charger maps is an additional cost. Please contact your Account Manager to add this package to your organisation
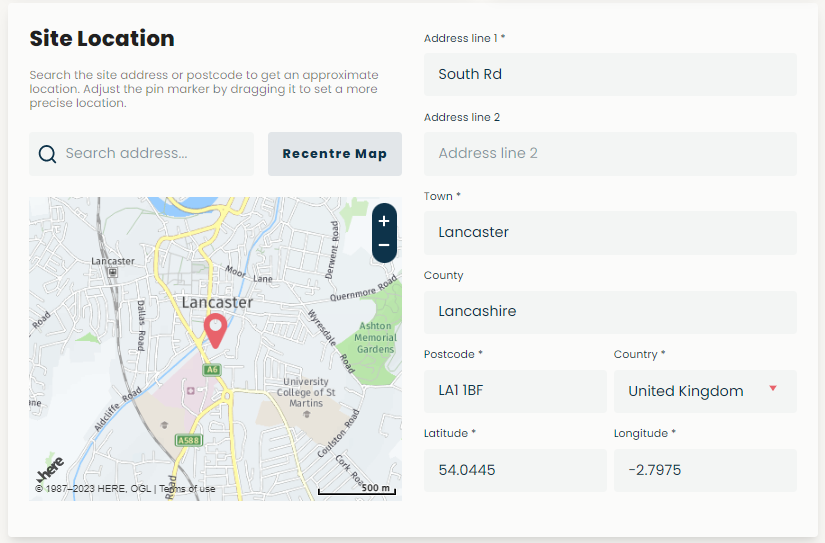
1. Verify your charger site information under Charging Sites
Under the Network section, verify all the Charger Site details for every public charging site are properly filled in:
- Name (This is the name of the Site)
- Address Line 1
- Town
- County
- Postcode
- Country
- Latitude*
- Longitude*
*Latitude and Longitude are set by the pin marker on the map and adjust when the pin marker is moved.
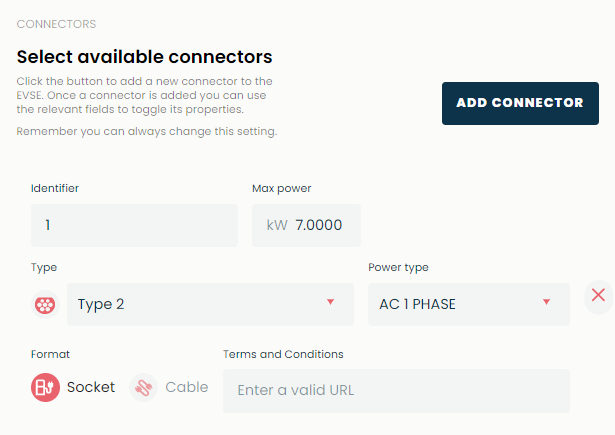
2. Have at least one live charger
Every charging site requires at least one live charger, which is managed on the Chargers page under the Network section.
To edit an existing charger, select the “Edit EVSE” button at the top right of the charger’s details page.
Required fields to register a live public charger:
- “Is Charger Live?” - must be set to “Live”
- EVSE Name
- OCPP / Hardware ID
- “EVSE Type” - must be set to “Public”
At least one connector is required to have the following fields filled in:
- Identifier
- Max Power
- Type (the connector type)
- Power Type
- Format
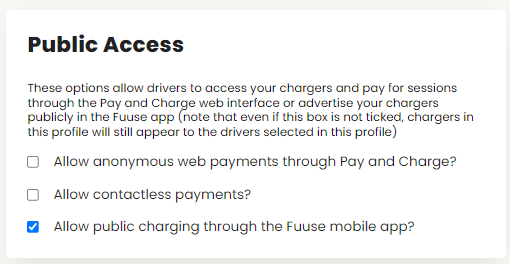
3. Configure charge card transactions on Access Control
Under the Access section, you can view and manage your Access Control Profiles. Here you can manage each profile by the “See Details” option, as well as add a new profile with the “Add New Profile” button at the top of the screen.
To enable charge card connections, on either the “Edit Profile” or “Add New Profile” screen of the desired Access Control Profile, ensure one of the following “Public Access” options is ticked:
- "Allow anonymous web payments through Pay and Charge?"
- “Allow contactless payments?”
- “Allow public charging through the Fuuse mobile app?”
If you have any questions about any part of this guide, please contact our Customer Success team and they will be happy to verify your account is set up properly.
4. Turn on "Location Services"
In order for your chargers to be displayed on external maps (e.g. Zapmap):
- Click "Public" on the left hand side of the screen
- Click "Location Services"
- Click "Connect" next to the location service that you want your chargers displayed on:

- Click "Public Chargers" and then "Save Changes":
