The process of connecting a charger to Fuuse is relatively simple.
The process of connecting a charger to Fuuse is relatively simple. Before you attempt to connect your charger though, you should have setup the following items in Fuuse:
- An organisation
- A site (location)
- The charger you are attempting to connect.
If you are missing any of the above, please follow our guides (links above) on setting those up through the platform.
Contents:
- Logging in to Fuuse
- Hardware ID
- Checking Charger Configuration
- Zaptec Portal
- Testing the Connection
- Set the Charger Live
1. Logging in to Fuuse
Firstly, use your credentials to log into the Fuuse platform at the link below:
You may be working with a 3rd party who has a white labelled version of Fuuse. In which case, use the URL you have been given.

2. Hardware ID
Once you have the above resources sorted, you're ready to point the charger towards Fuuse.
During the setup process you will have been asked to add a hardware ID for the charger. Please make sure that the ID of your charger matches this field.
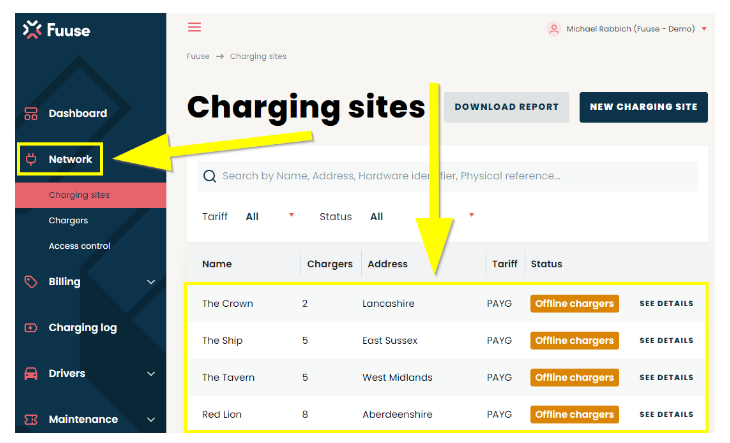
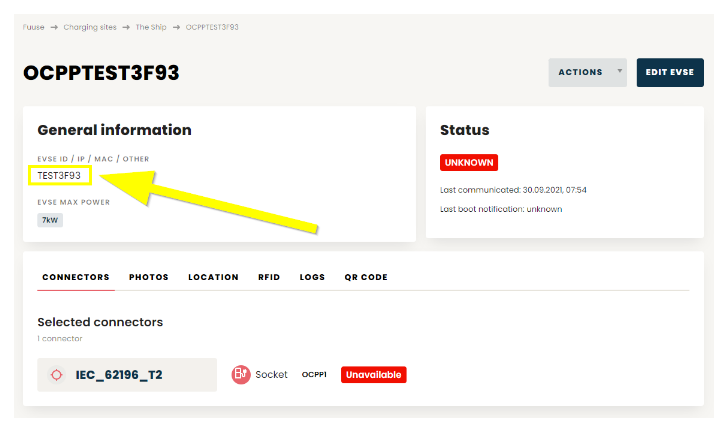
To find the hardware ID of your charger, click "Network" from the sidebar to be taken directly to the Charging Sites screen. From here, find the site that contains your Zaptec charger(s) from the list and click "See Details" or use the search bar to locate it.
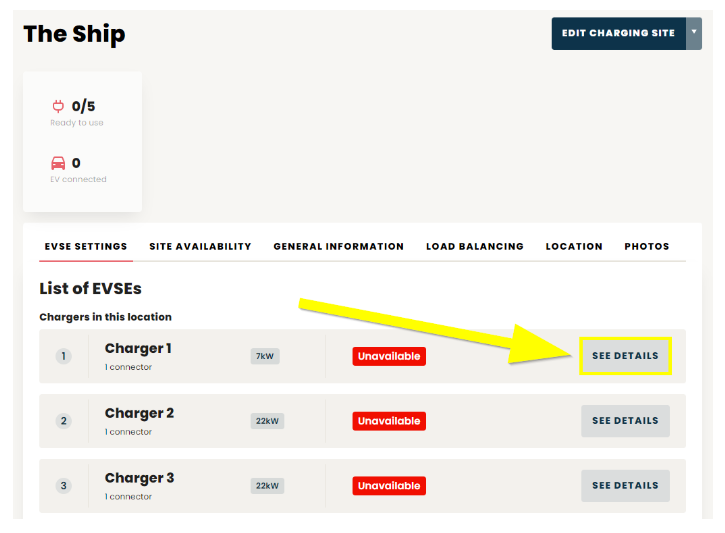
Here you will find a list of all chargers set up on your selected site. Select the charger you want to onboard by clicking the "See Details" button.
On the charger details screen, the hardware ID for this particular EVSE will be shown under "EVSE ID / IP / MAC / OTHER" in the General Information section. Make a note of this ID before you continue.
3. Checking Charger Configuration
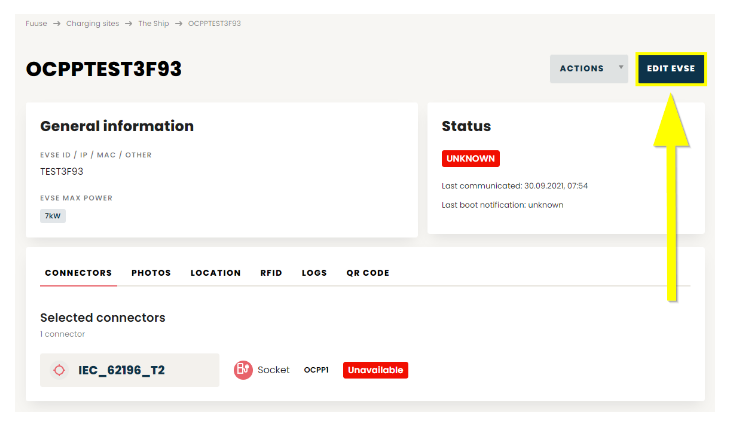
It is good practice to ensure your EVSE is set correctly in Fuuse before moving forward.
Click the "Edit EVSE" button to continue.
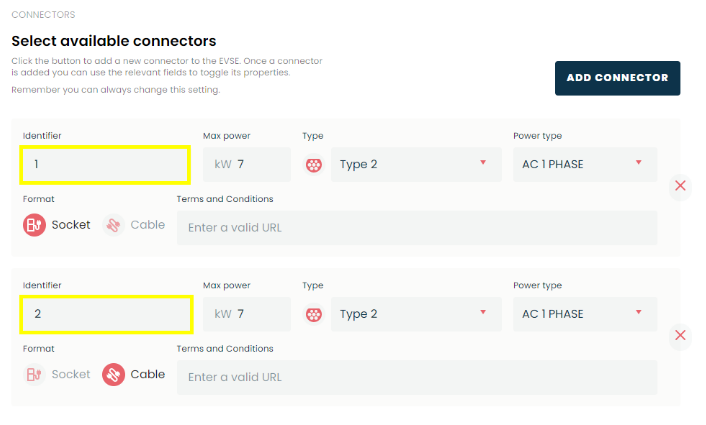
Much of how you set up your charger is subjective and specific to the model. Play close attention to any documentation provided by the manufacturer to ensure all options and values have been set correctly.
It is important for all connectors to have an appropriate identifier. These should be numbered sequentially as 1, 2, 3 etc, as shown below.
Take a moment to review things like the connector type, max power and the various other settings like free vend mode, and ensure they are set accordingly for your hardware and your needs.
4. Zaptec Portal
Once you are confident your charger is configured correctly in Fuuse, login to the Zaptec portal.
Once inside, click the "Installations" tab, followed by "Settings" and finally "Authentication", as shown below.
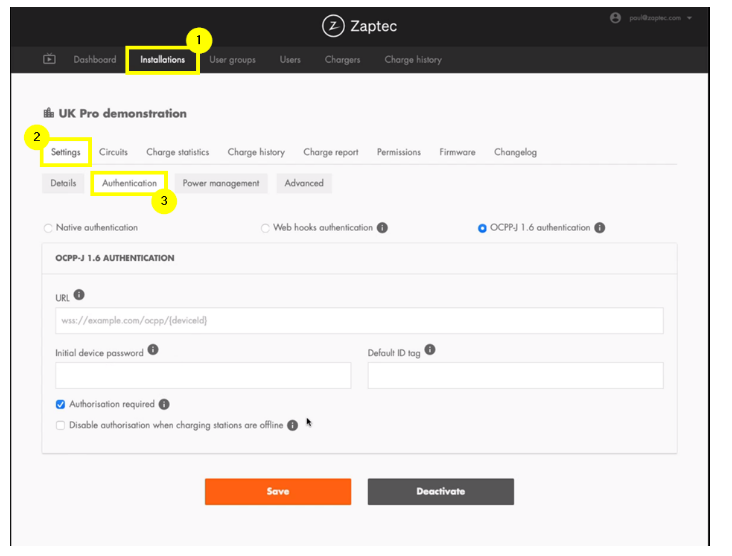
Ensure "OCPP-J 1.6 authentication" is the selected authentication type.
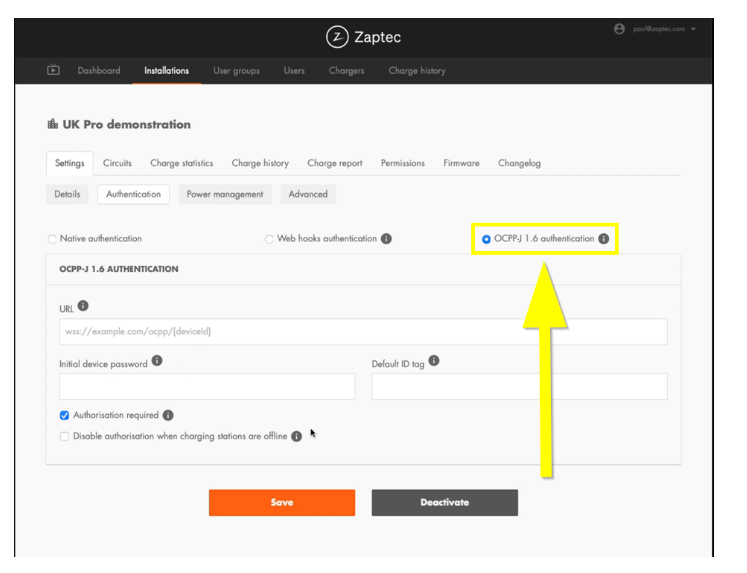
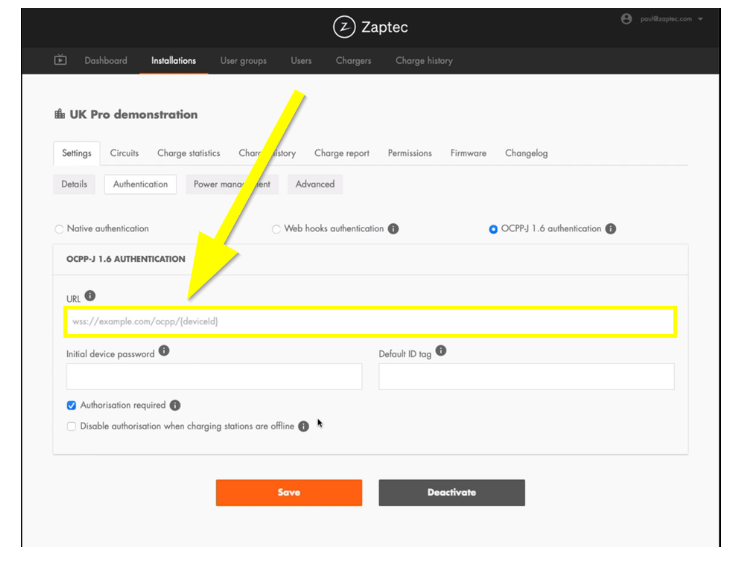
In the URL section, enter ws://hw.fuuse.io:9998/{deviceId} and replace {deviceId} with the ID of your Zaptec charger. This is the specific hardware ID of your device, which you made a note of in the steps above. The device ID should be entered in lower case.
For example, if your charger's hardware ID is "zapteccharger0001" then the URL would be:
ws://hw.fuuse.io:9998/zapteccharger0001
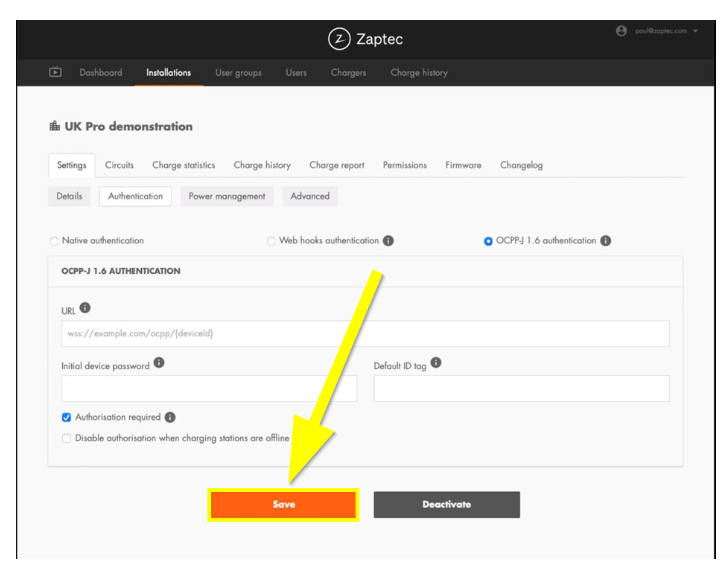
After you have entered your URL, click the "Save" button to confirm your choices.
Follow the steps below to ensure the connection is working as it should and finalise the process.
5. Testing the Connection
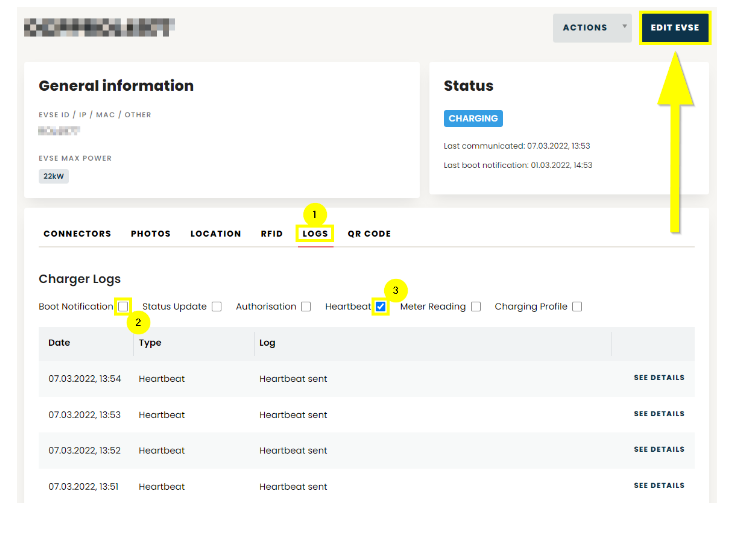
Once connected, you may wish to check that your commands are reaching Fuuse. Within the Fuuse web portal, we provide a curated set of logs around key commands.
To view the logs of your charger, head back to the Fuuse web portal and visit the charger screen, as you did at the start of this guide.
Click the "Logs" tab, as shown below and check "Boot Notification" and "Heartbeat" (separately) to see log data related to them. Don't worry if you don't understand the information in the logs, as it will at least show that commands from your charger are reaching Fuuse.
When you are happy your charger is communicating with Fuuse, click the "Edit EVSE" button to continue.
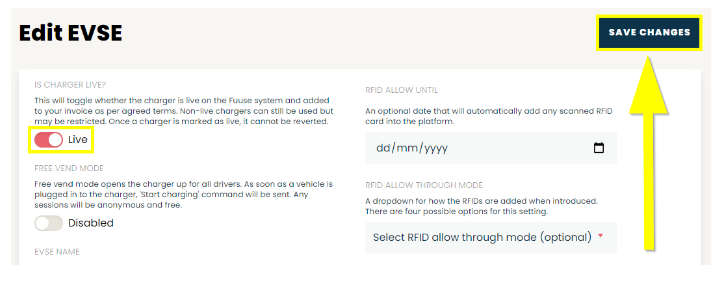
6. Set the Charger Live
The final step is to set your charger as being live by clicking the "Live" toggle on the charger edit screen.
Congratulations, your charger is now fully connected to the Fuuse system and ready to go.