The Fuuse web portal allows you to setup a VAT receipt that will be sent to every driver after they complete a session.
The Fuuse web portal allows you to setup a VAT receipt that will be sent to every driver after they complete a session. These receipts can be customised with your organisations details, and if you're a white-labelled customer, you can choose the branding to use as well.
Contents:
1. Fuuse Messaging
2. Organisation Details
3. General Information
4. Support Details
5. Branding
1. Fuuse Messaging
To use VAT receipts, you must have Fuuse Messaging enabled on your account. This can only be activated by us at Fuuse on your behalf and may already be part of your package with us.
If you believe you don't have Fuuse Messaging and would like it switching on, please contact us at support@fuuse.io and we will be happy to discuss adding it to your account.
2. Organisation Details
To get started, log into the Fuuse web portal and click the arrow next to "Organisation".
From the expanded menu, click "Organisation Details".
3. VAT Information
On the Billing tab you can configure the VAT which is shown on the VAT receipt. Ensure this is completed in full and accurate.
Note: You the VAT number field will only be visible once Stripe (our payment processor) is added to the account.
This information will display at the bottom of the VAT receipt, as shown below:
4. Support Details
Click the "Support" tab to switch to the Support Details section.
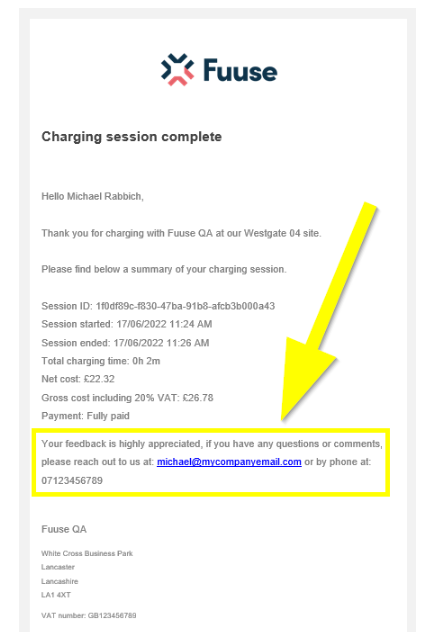
Here you can configure the support telephone number and email that will be shown on the VAT.
If you have purchased a Driver Support package with Fuuse, you can enter the freephone support number provided to you.
If you have not purchased driver support, please enter your companies details in case drivers require support while on site.
Your email and telephone number will display on the VAT receipts as shown below:
Finally, be sure to click the "Save Changes" button to lockdown these and any changes made on the previous tabs.